
How to Make a Reversible Tote Bag

This lined, reversible tote bag is one of my favourite beginner's makes. It is generally the first thing I teach people how to sew if they come to me having never used a sewing machine before and I’ve wanted to make instructions for soooo long.
So if you’ve made one with me in a workshop and need a bit of a reminder to go for it on your own, or you are new to sewing and fancy giving it a go, here are my instructions to sew your own lined tote bag.
Supplies and Tools
Fabric: 2 matching fabrics (cotton or upholstery fabric) – ½ metre each plus 4 inches of matching fabric for the straps (it is reversible so you can always choose two fabrics that you love to make the project!).
Scissors
Cutting Mat, Ruler and Rotary cutter (Optional- scissors will work fine)
Tape measure
Pins
Sewing machine
Matching Thread
Pencil or fabric pen
How To Sew a Reversible Tote Bag
Step 1: Preparation and cutting
Outer Fabric: Cut two 14 inch by 18 inch rectangles
Lining Fabric: Cut two 14 inch by 18 inch rectangles
Straps: Cut two 4 inch by 21 inch strips (I cut a 4 inch strip off the width of my fabric and cut it in half for the straps)

Step 2: Assemble the main part of the bag:

Place your 2 pieces of outer fabric with right sides together and pin around three sides, leaving the top short side open.
Sew around the three pinned sides with a 1/2 inch seam allowance. Don’t forget to backstitch at the start and the end of your sewing.
Repeat step 1 with the lining fabric.
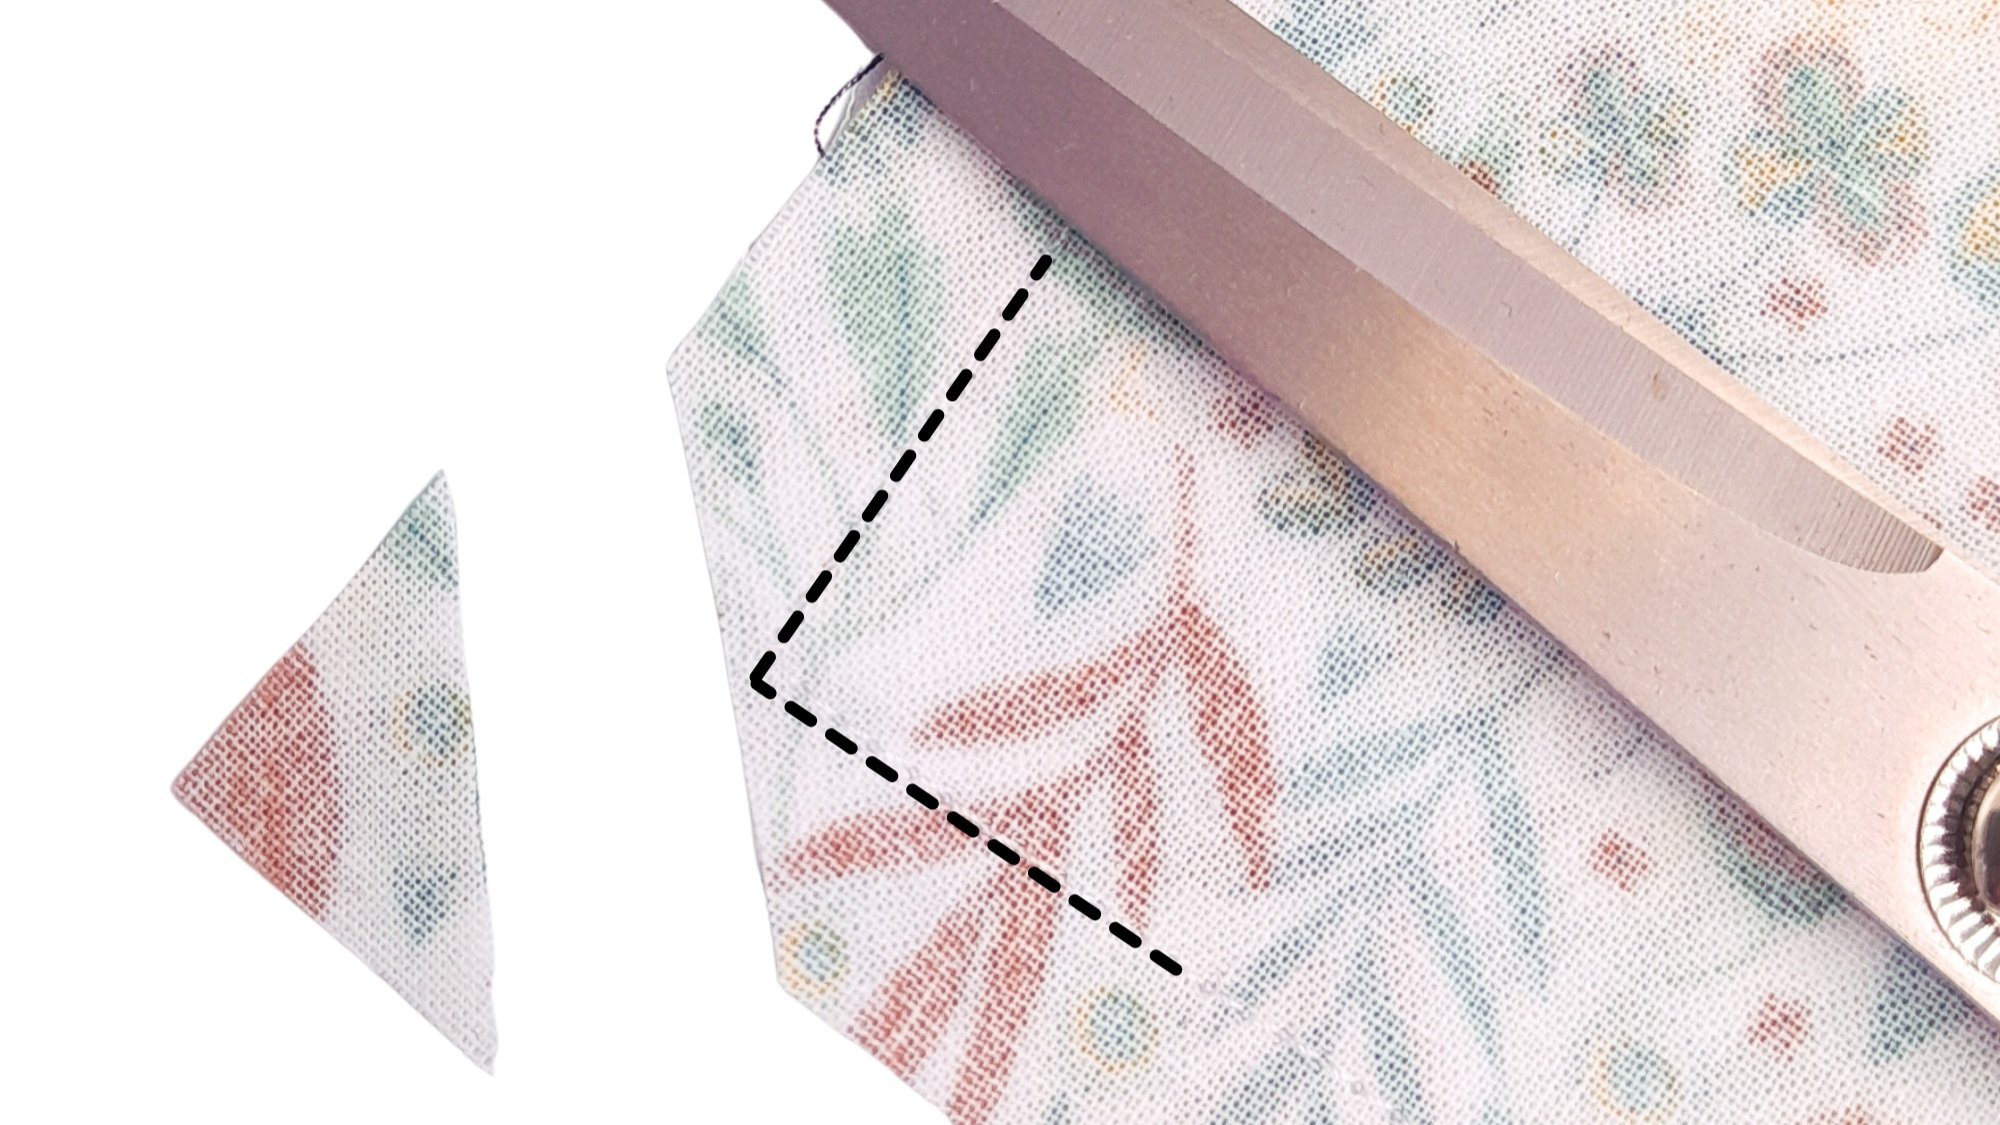
Clip both of the bottom corners of your outer bag and lining and trim your threads.
Step 3: Make the straps
Take one of the pieces of strap fabric, fold it in half lengthways and iron in the crease.
Open the fabric back up and iron in each edge so that it meets the crease in the middle.
Fold the strap in half and iron flat.
Top stitch down each long edge of the strap ⅛ inch from the edge making sure you catch in both sides on the open edge. Remember to backstitch at the beginning and end of each line of sewing.
Repeat for the second strap.

Step 4: Assemble the Bag and Straps
Turn the lining in the right way
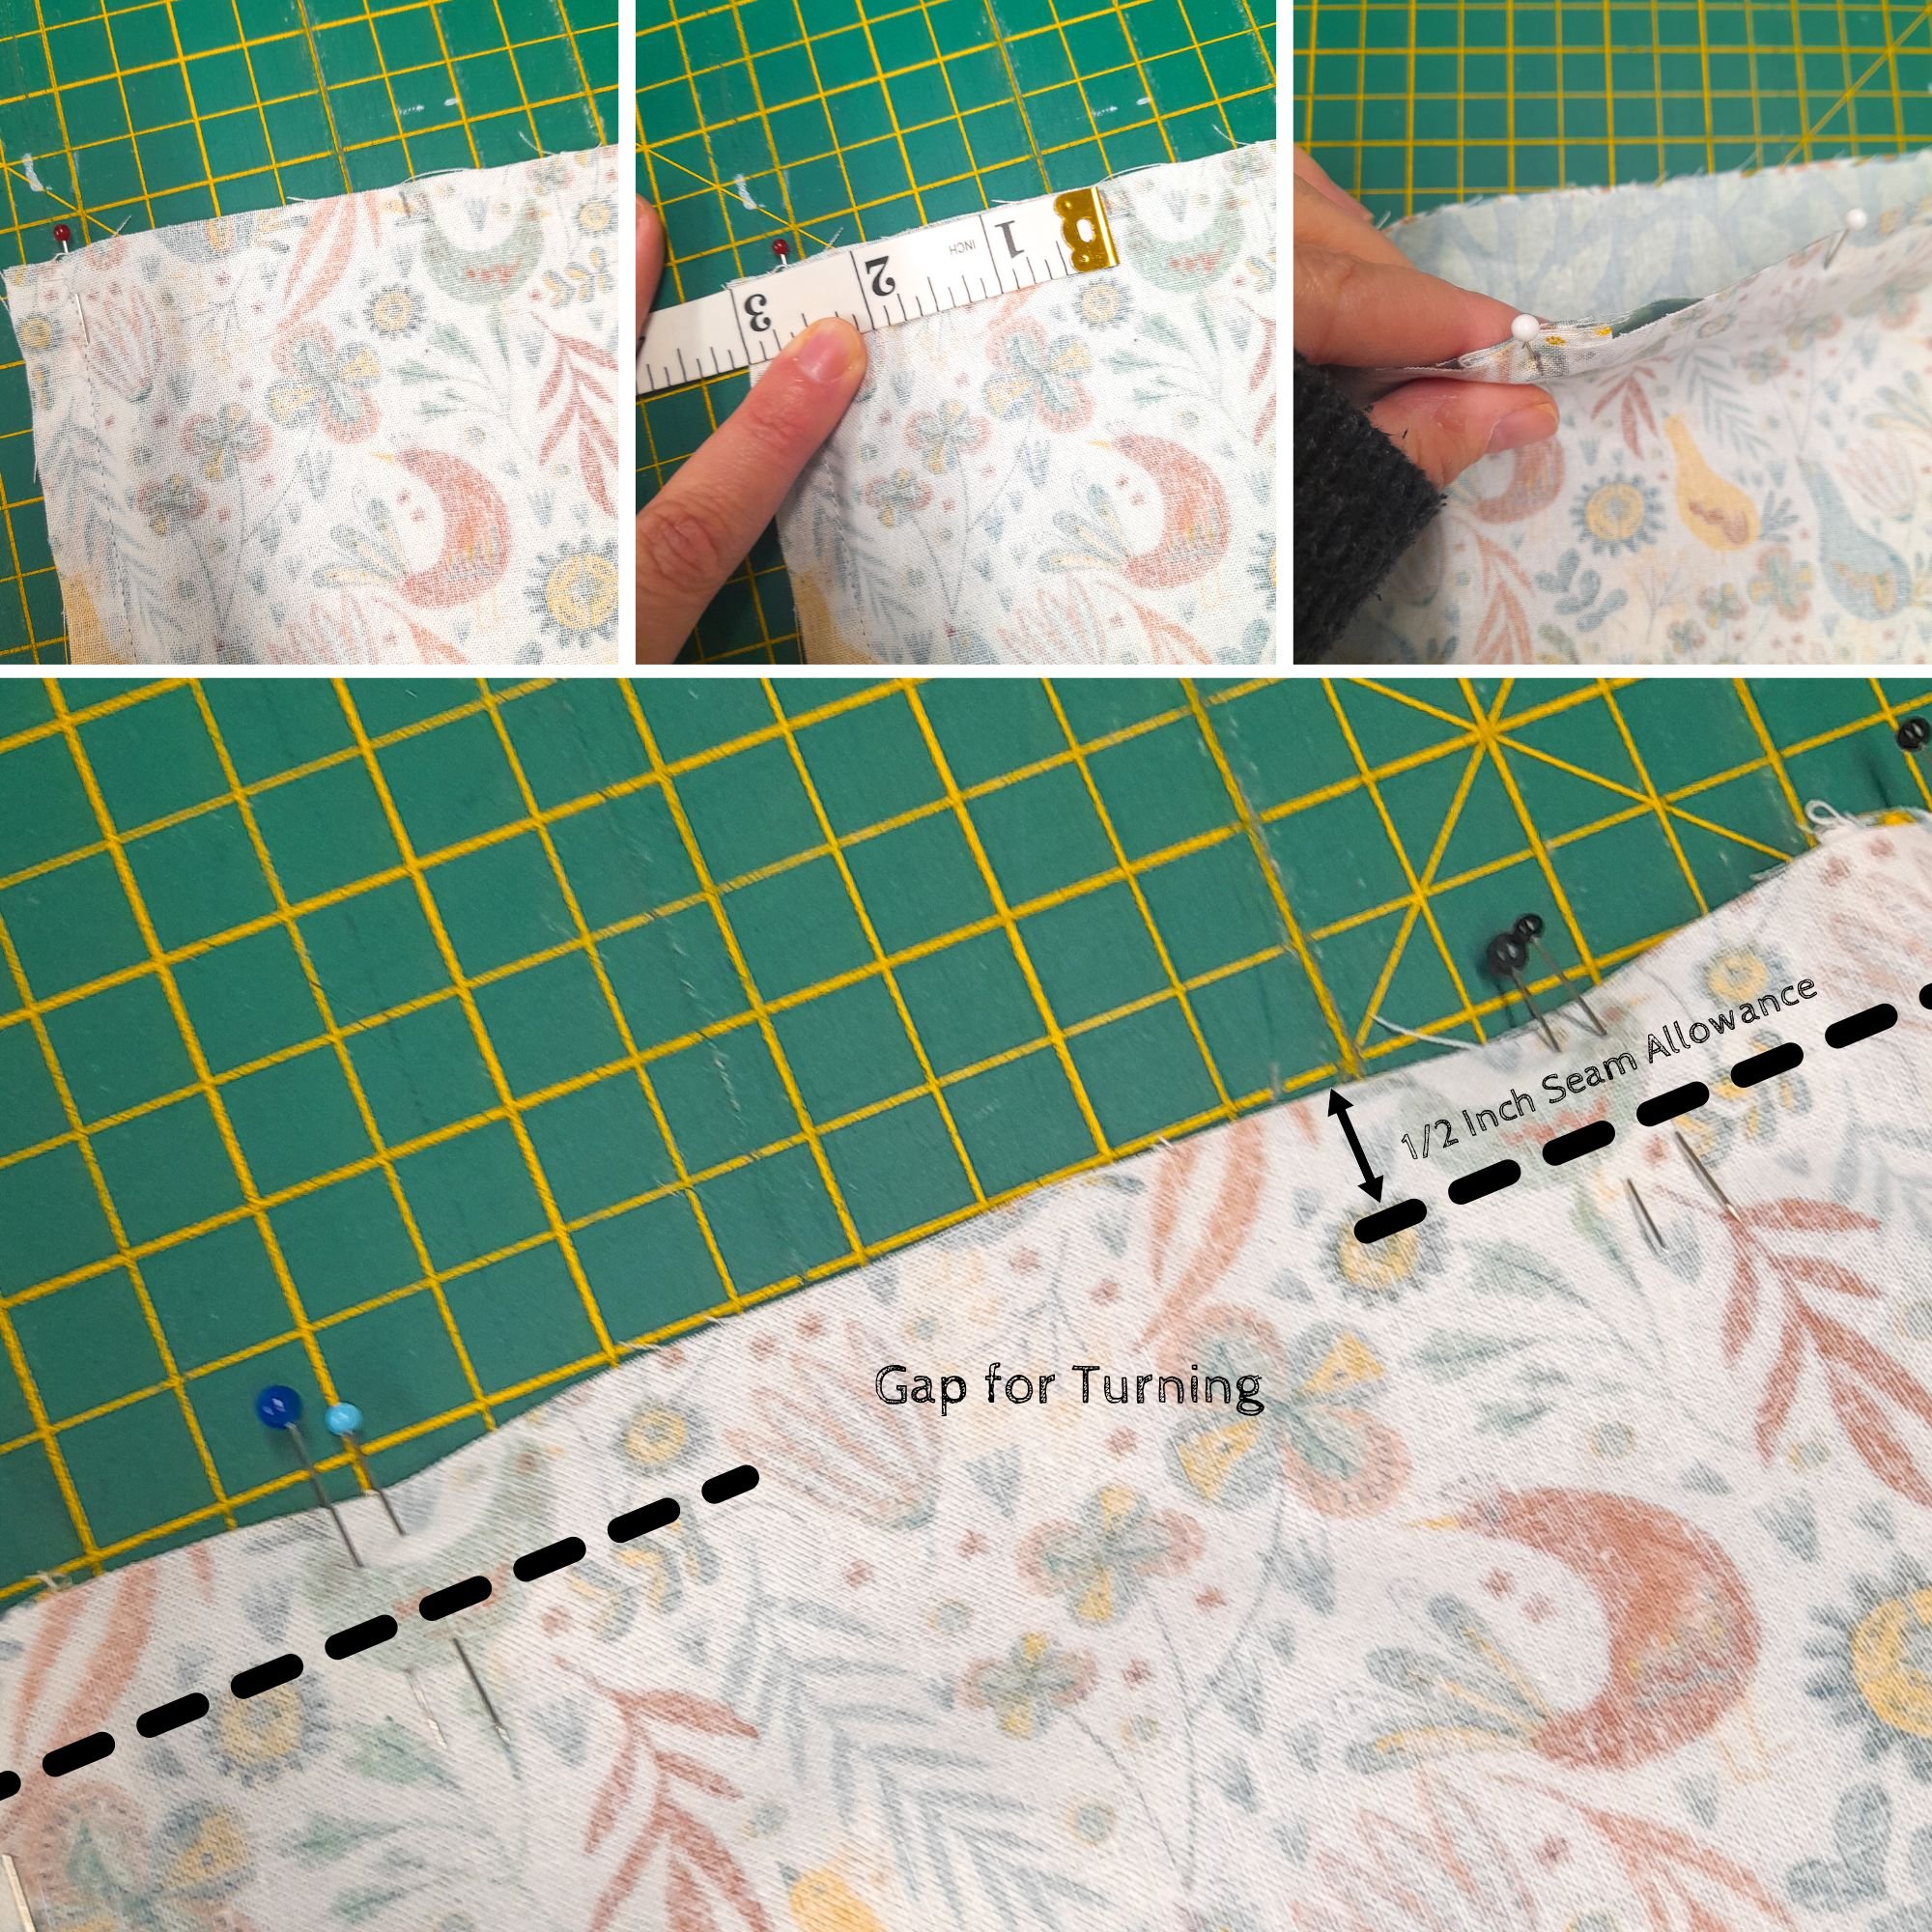
Put the lining inside the outer fabric so the right sides are together.
Pin together at the side seams and then lay the bag out flat.
Measure three inches in from each side of the bag and mark with a pencil or fabric pen on the top edge (These marks will be hidden when the bag is finished).
Line up straps with the marks and position between the lining of the bag and the outer fabric with the raw edges matching with the top of the bag making sure they are not twisted and pin them in place.
Sew Around The Top
Sew around the top with a ½ inch seam allowance leaving a 3 inch gap in between one strap. (Top Tip - Mark the gap with a double pin so that you remember where to stop sewing!)
Turn in the right way through the gap you’ve left and use a chopstick to help push out the corners.

Finish It off…
Iron top seam and fold in the seam allowance of the gap.
Topstitch around the top edge of the bag ¼ inch from the top.
